

How To Change Battery On Genie Garage Door Opener
Genie Key Pull a fast one on Battery Replacement Guide
How to change a weak or expressionless battery in the G3T-R mini key fob remote command for a Genie garage door opener.
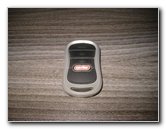
Genie G3T-R Key Fob
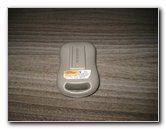
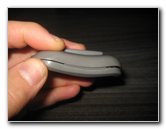
Back Side of Remote
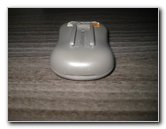
Notch On Acme Border
Owners of other similar Genie remote control units such as the GM3T-BX, 38501R, G1T-BX or GITR-3 may likewise notice these DIY instructions to be helpful.
The compatible replacement coin cell (likewise known every bit a "watch" or "button") battery is office number CR2032 which is bachelor from diverse manufacturers such equally Energizer, Panasonic, Duracell, Sony or Maxell.
The just tool needed to access and supersede the battery is a small flathead screwdriver or something similar such every bit a coin, butter pocketknife or blast file.
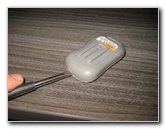
Insert Flathead Screwdriver
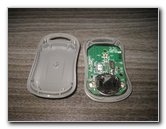
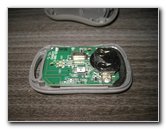
Dorsum Comprehend Removed
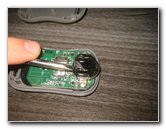
Button Out Old Battery
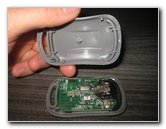
Then locate the modest notch on the acme edge of the play tricks.
Insert the flathead screwdriver into the notch.
Gently pry apart the 2 halves of the fob.
Elevator off the rear cover and prepare information technology aside in a safe place.
Use the screwdriver or your finger nail to carefully push the old battery out of the socket.
Move the battery from the eye of the fob towards the outer edge.
Try to avoid scratching, gouging or damaging the light-green circuit board or the metallic electrical contacts.
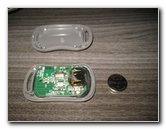
Old Battery Removed

Energizer CR 2032 3V
Slide In New Battery
Orientate the new CR2032 battery with the positive "+" side facing up towards you lot and the negative "-" side facing down towards the green circuit lath.
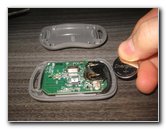
New Battery Installed
Line Up Rear Cover
Snap Together Two Halves
Brand sure the new battery is fully seated in the holder.
Line up back cover over the forepart half of the fob.
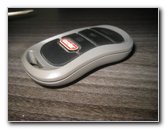
Central Pull a fast one on Re-Assembled
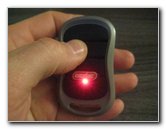
Red LED Light - Testing

Green LED Light
Make sure that the front and rear of the fob are flush together at every edge.
Exam the new battery by pressing the buttons on the fob.
The carmine LED lite indicates an IntelliCode 1 button operating at 390Mhz. The dark-green LED lights indicate the buttons operating at the newer IntelliCode ii 315Mhz frequency.
The remote should not need to be re-programmed. Replacing the bombardment shouldn't clear the original programming.
If you practise need to re-program the fob, follow these steps: 1. Printing and concur the "Program" push for a few seconds and release it. You should run across the program low-cal flashing. ii. Press the button on the fob remote control that yous would similar to employ for operating the garage door opener. 3. Test the fob by pressing the button on the fob.
For more than, check out all of my Domicile DIY Repair & Maintenance Guides.
Source: https://paulstravelpictures.com/Genie-Key-Fob-Battery-Replacement-Guide/index.html
Posted by: hiersmorgilizeed.blogspot.com
0 Response to "How To Change Battery On Genie Garage Door Opener"
Post a Comment